How To Create A Business Page On Facebook
I’m writing this blog post because I’ve recently been in a few meetings where one of the last things I said was “… and we’ll send through some instructions on how to create a Facebook page”. I could have just written it down in an email then copy + pasted it whenever I needed to, but I thought it would make more sense to put it in a blog post for anyone to see.
I’ll note that these instructions are current as of the 10th of March, 2011 – but the process does change every now and then, so apologies if you’re viewing this from the future and it’s no help.
First of all, to be an administrator for a Facebook page, you have to have a Facebook account yourself. If you don’t yet have an account, just go to www.facebook.com and follow the instructions.
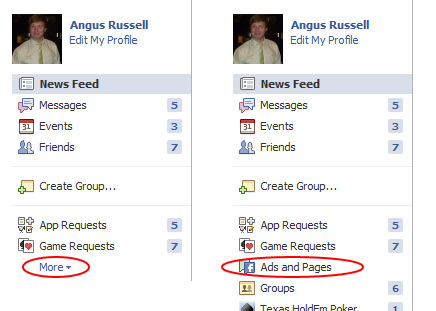
Once you’re logged in to Facebook, on the left hand side of your home page you’ll see a menu under your profile picture. This menu can be different for everyone (and changes every time Facebook gets an overhaul), but for me I need to click on More then I see the Ads and Pages option.
Of course, the way to get there may have changed by the time you read this post, so if you can’t find it in the menu, try clicking here.
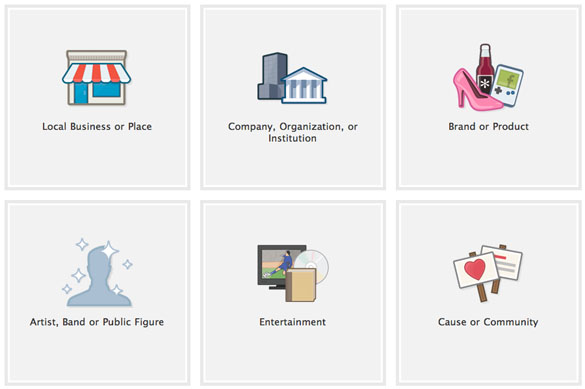
The “Create a Page” page currently looks like this:
Choose the option that best describes what you want to advertise, then add your details to the form that pops up. Congratulations! Your Facebook page now exists, but there are still a couple more steps that you should complete.
- Click on “Edit Info” (you’ll find it near the top of the page), and fill in everything you can.
- Go back to your page by clicking on “View Page”, then add an image for your page by hovering over the big question mark in the top left corner and clicking on “Change Picture”. This would usually be your logo, but don’t be afraid to be creative with the space you have, check out these three examples.
That’s it! Now you can start posting status updates, invite all your friends, promote your page elsewhere etc.
As a bonus, here are some more tips:
- Add a “Like Box” to your website or blog to help convert your website visitors into Facebook fans.
- Sync your blog to your Facebook page so that your fans get notified when you publish a new blog post.
- Create a custom landing page for non-fans with content that urges them to click the “Like” button.
- Check out these other tips I wrote about a while ago.
- Consider these other ideas from Adam Franklin’s post…
- And check out Paul Goldston’s article on the strategy side of things on Reload Media’s Search Strategy Blog.


